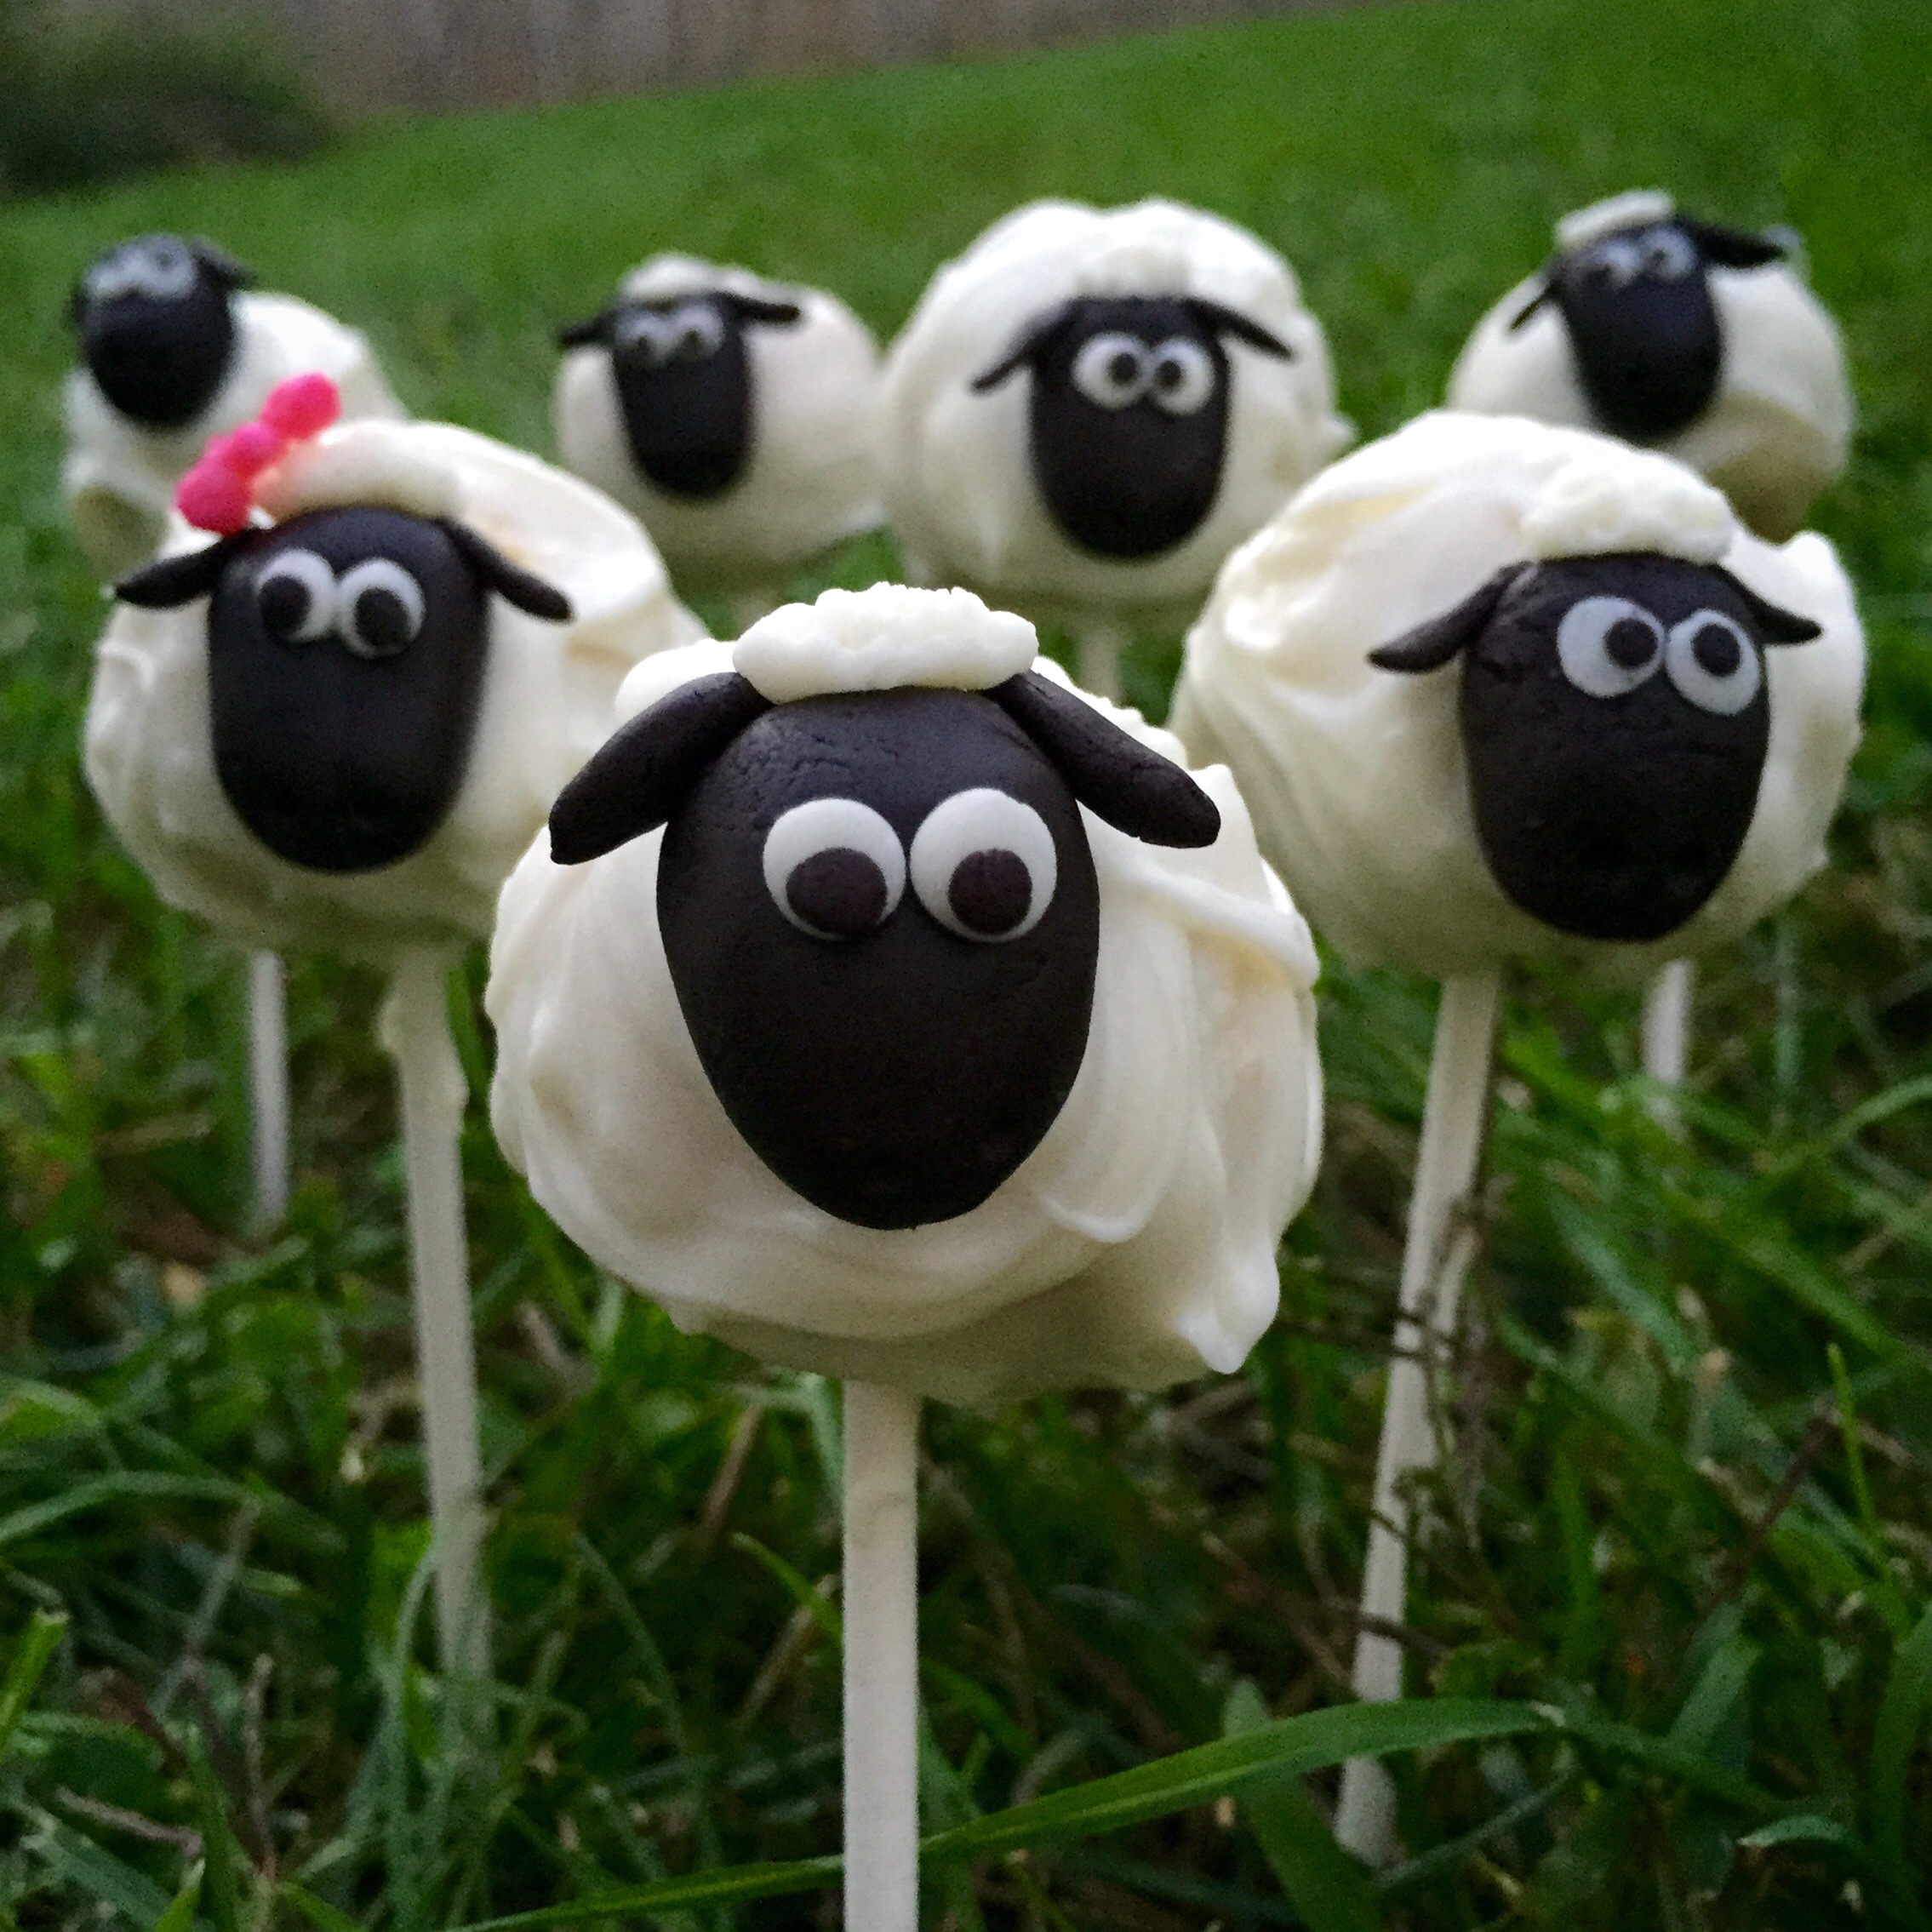

Eid Al-Adha is right around the corner! Make it extra sweet with these adorable sheep cake pops.
Don’t be intimidated by making cake pops. I have a few tips that my friend Hanadi has shared with me to insure that you don’t fail. The cake pops featured in this post are my 2nd attempt at cake pops – my first attempt was an absolute disaster. But I used a totally different method today and it was SO much easier.
Ingredients:
Makes 20-24 cake pops
1 box of cake mix (I used Betty Crocker’s Rainbow Chip Mix)
8 oz frosting of choice (I used Betty Crocker’s Cream Cheese frosting)
Wilton’s Shape-N-Amaze Edible Decorating Dough (Black and White colors)
Cake pop sticks
Foam Block or Cardboard box (to stick cake pops in for drying time)
1-2 bags Wilton’s white Melting Candy
Food Coloring (optional)
Step 1: Follow directions on your cake box and bake the cake. Set aside cake until completely cool.
Step 2: While cake is cooling, begin creating your sheep faces using the Shape-N-Amaze Dough. Use a toothpick to make a nose and add texture to sheep’s “hair”. If you want to create a “bow” for a girly sheep, you can add a bit of food coloring to the white dough.
NOTE: Dough is going to feel incredibly tough at first, but keep kneading small amounts in your fingers and it will eventually feel like soft clay.


Step 3: When completely cool, crumble cake into a large bowl. Be sure to leave behind the edges of the cake because they aren’t moist and will ruin the consistency of your cake pop. I totally ate all of the edges I left behind.

Step 4: Mix 8 oz of frosting into the cake crumble and mix with hands. Then using your hands create 1 -1 1/2 inch balls and place on tray covered in parchment paper.

Step 5: Toss cake balls into the refrigerator for about 1-2 hours. You want the cake to be firm but not completely hard. I also like to put them in the freezer for about 10-15 minutes right before I begin working with them.
Step 6: Melt Wilton’s melting candy. You may use a microwave or use the double boiler method. I much prefer to use the double boiler method. Sometimes microwaves will burn the melting candy if you’re not careful.

Step 7: Remove cake balls from refrigerator. Dip cake pop stick into the melted white candy and then poke into the cake ball. Go ONLY about 1/2 way into the cake pop. If you go further, you risk poking a hole through the cake. Set the cake pop aside to let the candy melt dry around the stick.
NOTE: If you ever feel like the cake pops are going back to their super soft, warm state. Just pop them into the fridge or freezer and just pull out each cake pop one by one while you are creating them.


Step 8: As soon has the candy has hardened (shouldn’t take more than 10 minutes or so), grab a cake pop and begin “painting” on the candy melt with a spoon. Unlike usual cake pops where you’re trying to create an ultra smooth surface, this cake pop needs a “messier look” because it’s supposed to resemble sheep’s wool.

Step 9: Poke your cake pop into your block of foam or cardboard box.
NOTE: If using a box, I suggest you poke holes into it with a skewer prior to trying to stick the cake pop into it.
Step 10: While the candy melt is still wet but sticky, stick the sheep’s head to the cake pop. Hold it for a few seconds to make sure that it will stay put.


Step 11: Let your cake pop continue to dry completely. When the candy melt has hardened it is ready to be enjoyed.

Sahtain!